Open Your Repository
Launch Schaltwerk
Open the app from your applications menu, or via terminal:macOS:Windows: Launch from Start menu or double-click the desktop shortcutLinux:
Prefer the CLI? Running schaltwerk always lands on the Home screen first. Pick a repository manually every time—no project is auto-selected on startup.
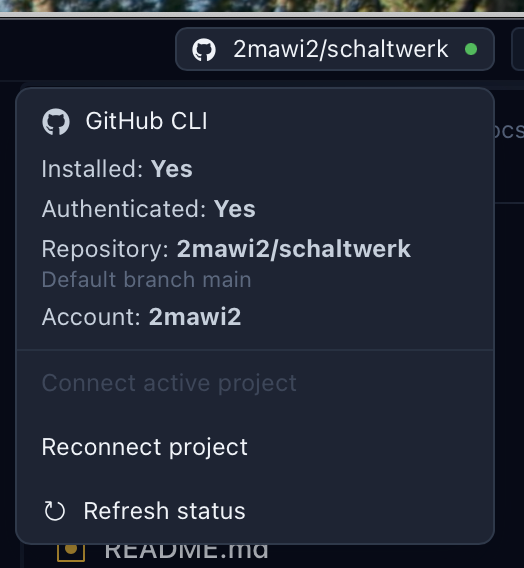
Open a project
On the Home screen, click Open Repository and select your Git repository.
Schaltwerk verifies that the folder is a valid Git repository before opening it.
Create a Session
Sessions are where AI agents work. Each session runs in its own isolated git worktree with its own branch.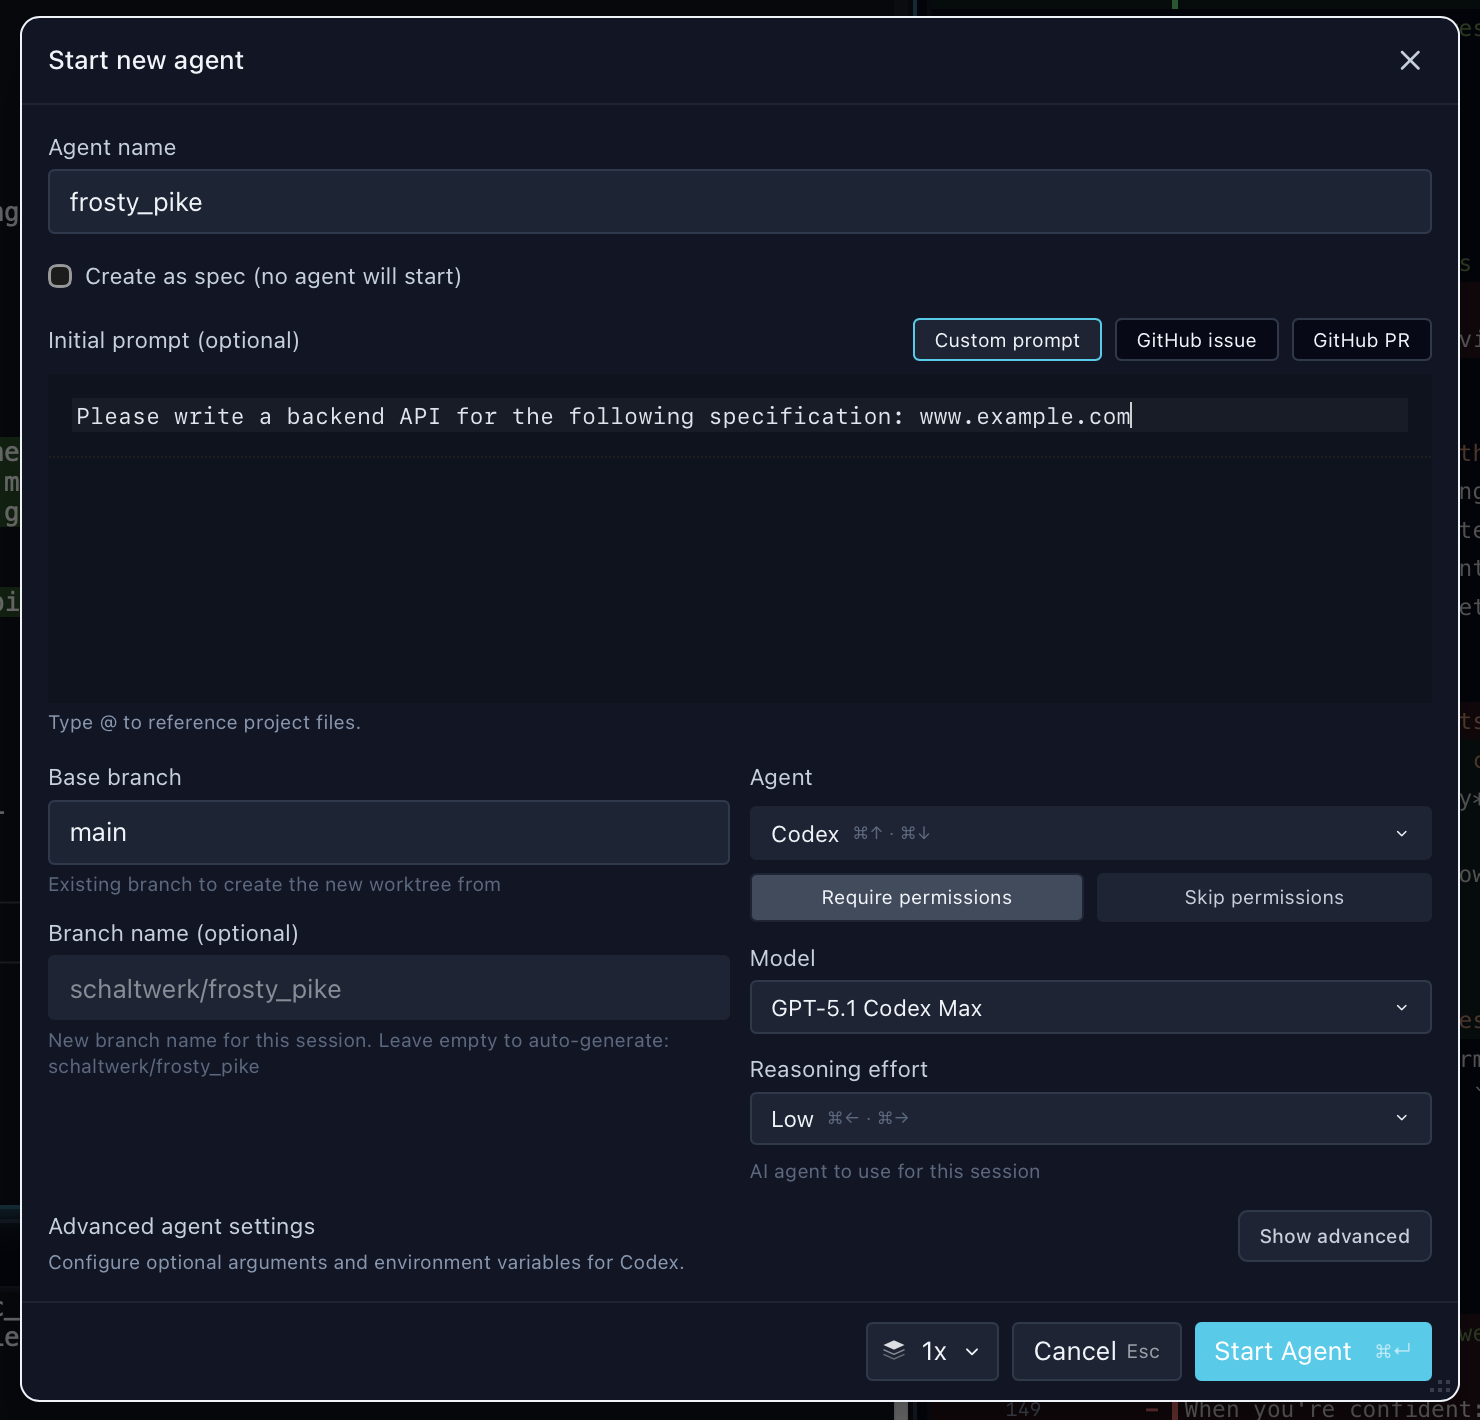
Enter a task description
Choose your prompt source:
- Custom prompt — Write your own task description
- GitHub issue — Import an issue with its description, labels, and comments
-
GitHub PR — Import a PR with its context and discussion

Select your agent
Choose which agent to use:
-
GitHub Copilot - Great for iterative tasks; requires
npm install -g @github/copilotand trusting the worktree once - Claude Code - Best for complex refactoring and understanding large codebases
- OpenCode - Open-source option
- Codex - Fast, efficient, great for smaller tasks
- Gemini - Alternative AI assistant
- Kilo Code - Powerful CLI with architect and autonomous modes
- Qwen - Alibaba’s advanced AI coding assistant
- Factory Droid - Specialized agent for code generation and automation
- Amp - Advanced coding agent with powerful tools
-
Terminal Only - Manual work without AI agents, opens only a usable terminal
For AI agents, make sure you’ve configured them in Settings. See Agent Setup for details. Terminal Only mode doesn’t require configuration.
Press ⌘Enter to start
Schaltwerk will:
-
Create a new git branch named
schaltwerk/<session-name> -
Create an isolated git worktree at
.schaltwerk/worktrees/<session-name>/ - Spawn two terminals (agent terminal on top, your shell below)
-
Start the agent with your task description
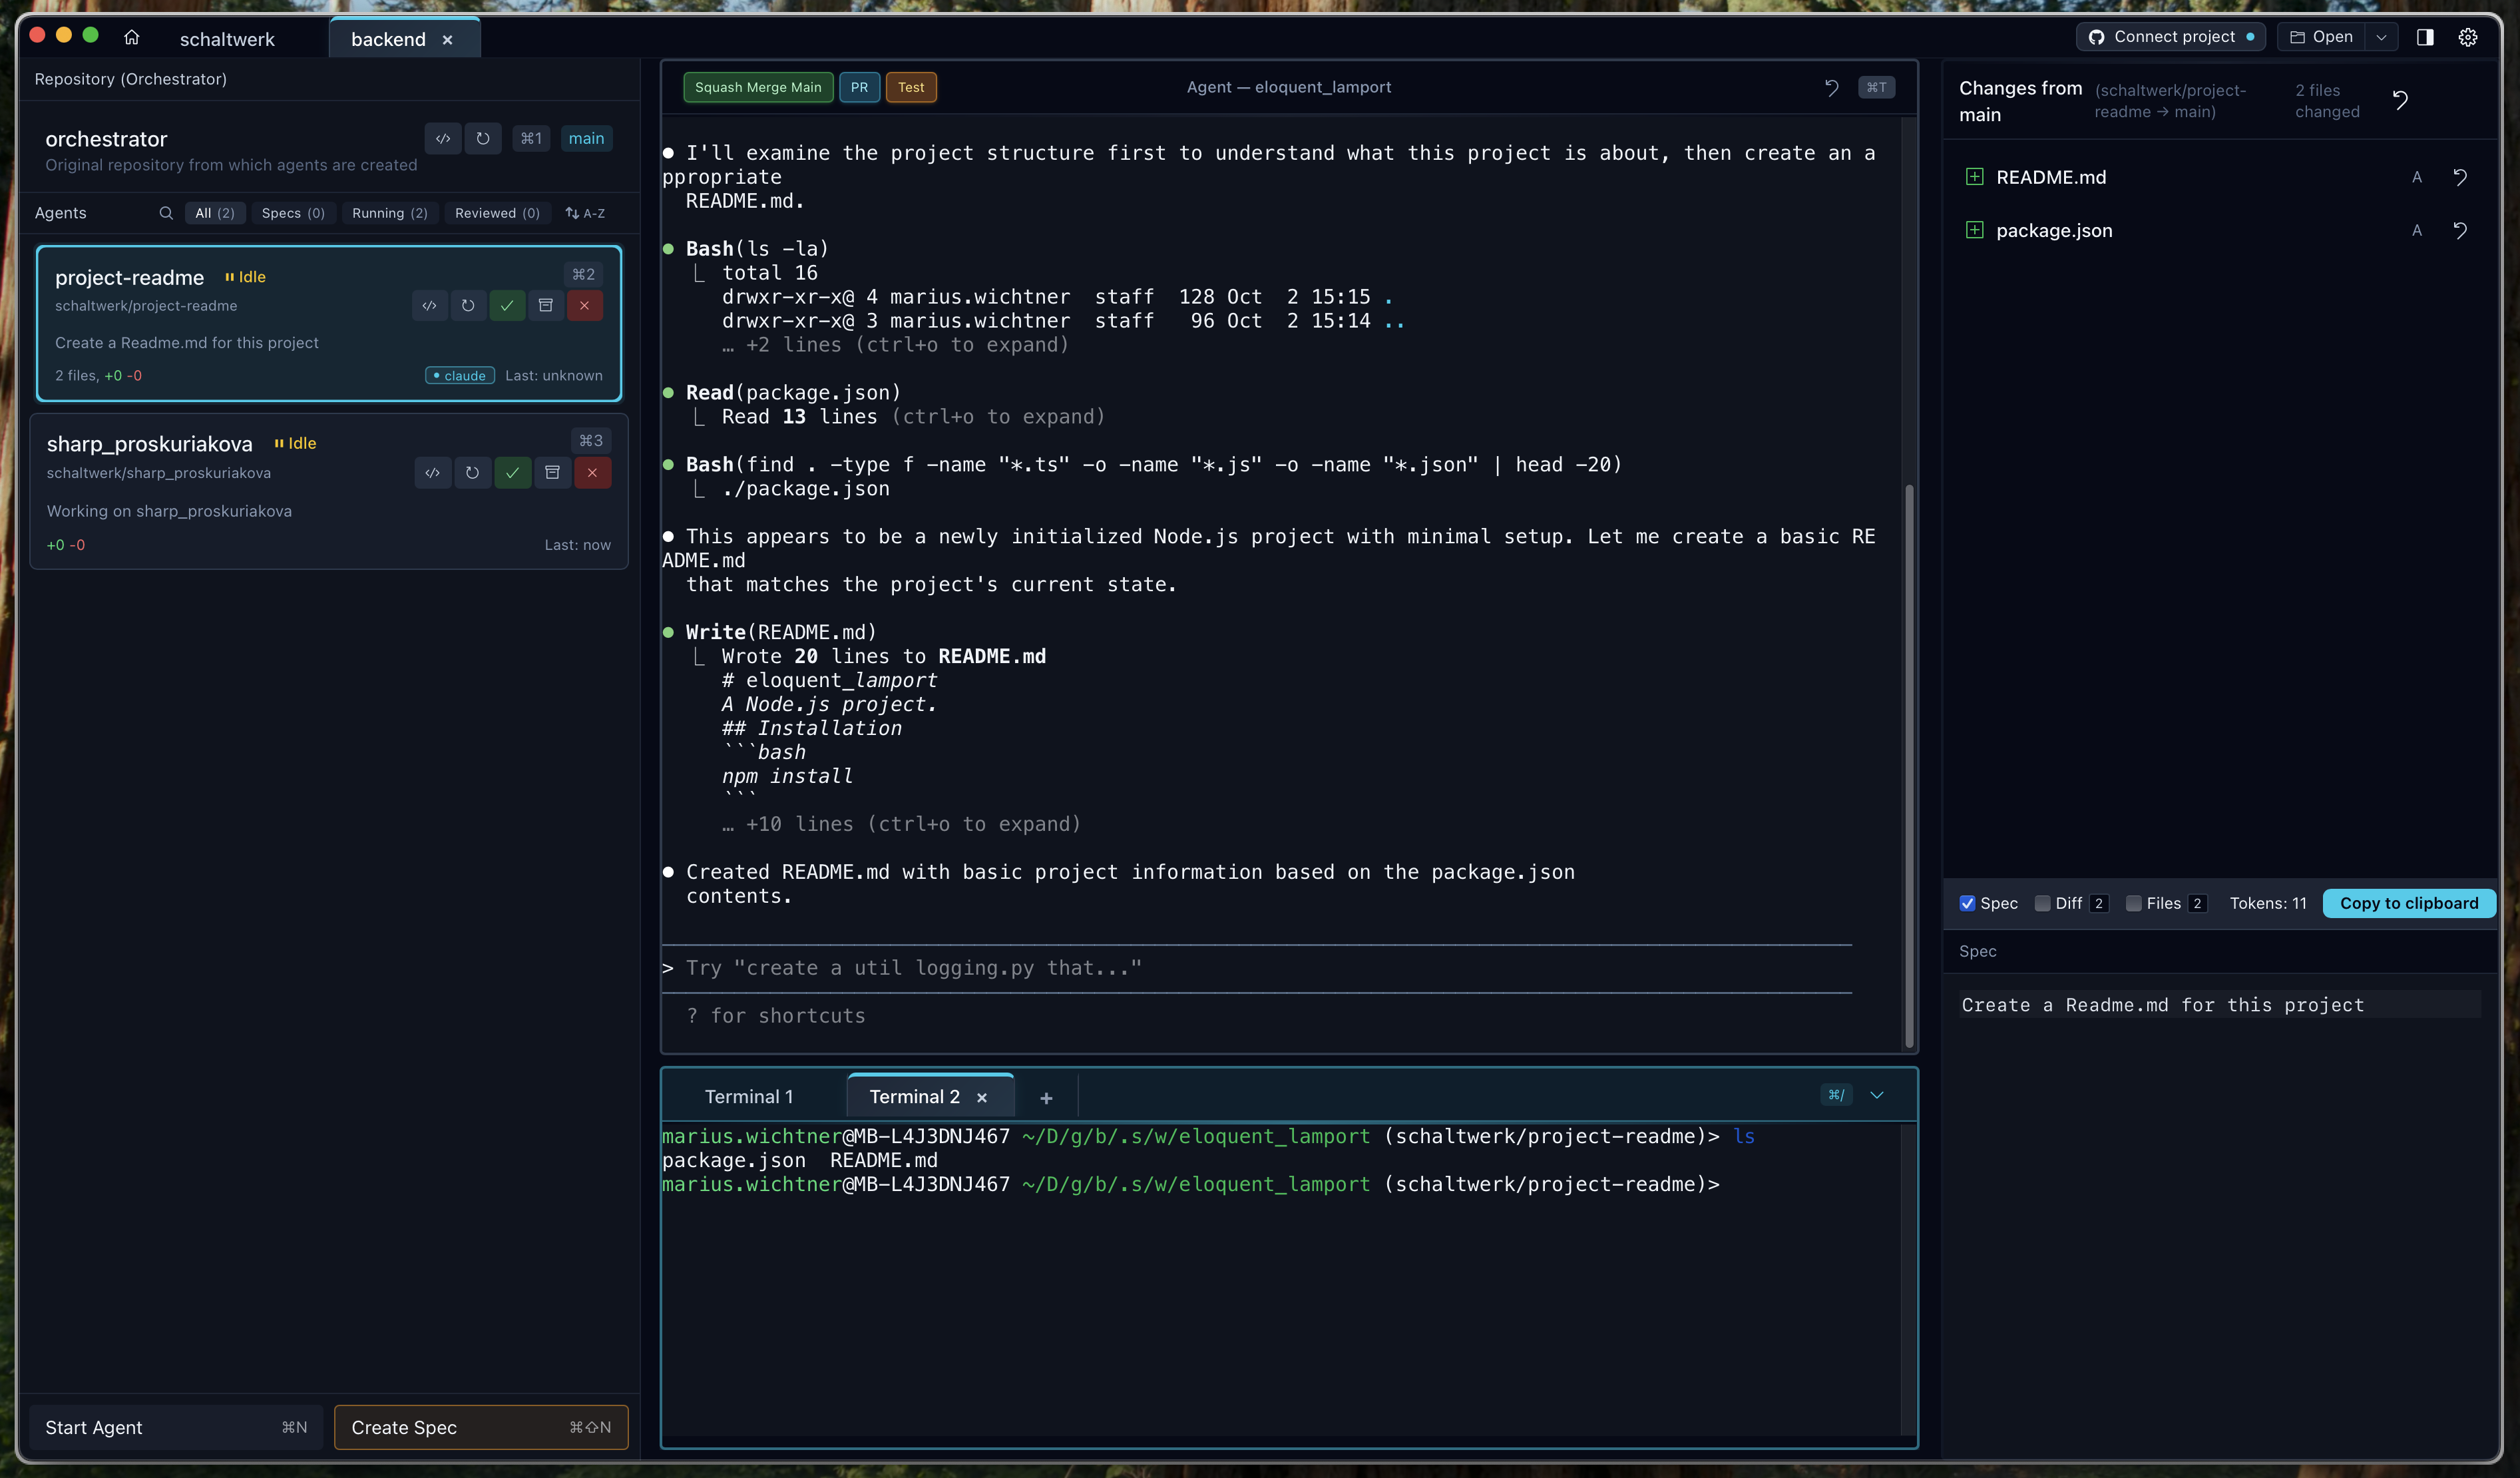
Watch Your Agent Work
The agent appears in the sidebar and starts working immediately.
Top Terminal (Agent)
Top Terminal (Agent)
Shows the AI agent’s output in real-time. Watch as it:
- Reads and understands your codebase
- Makes edits across multiple files
- Runs tests and validates changes
⌘T to focus this terminalBottom Terminal (Your Shell)
Bottom Terminal (Your Shell)
Your personal shell in the session’s worktree. Use it to:
- Run tests manually
- Inspect changes with
git diff - Execute build commands
⌘/ to focus this terminalRun Mode
Run Mode
Configure a run script in Settings → Run & Environment → Run Script, then press 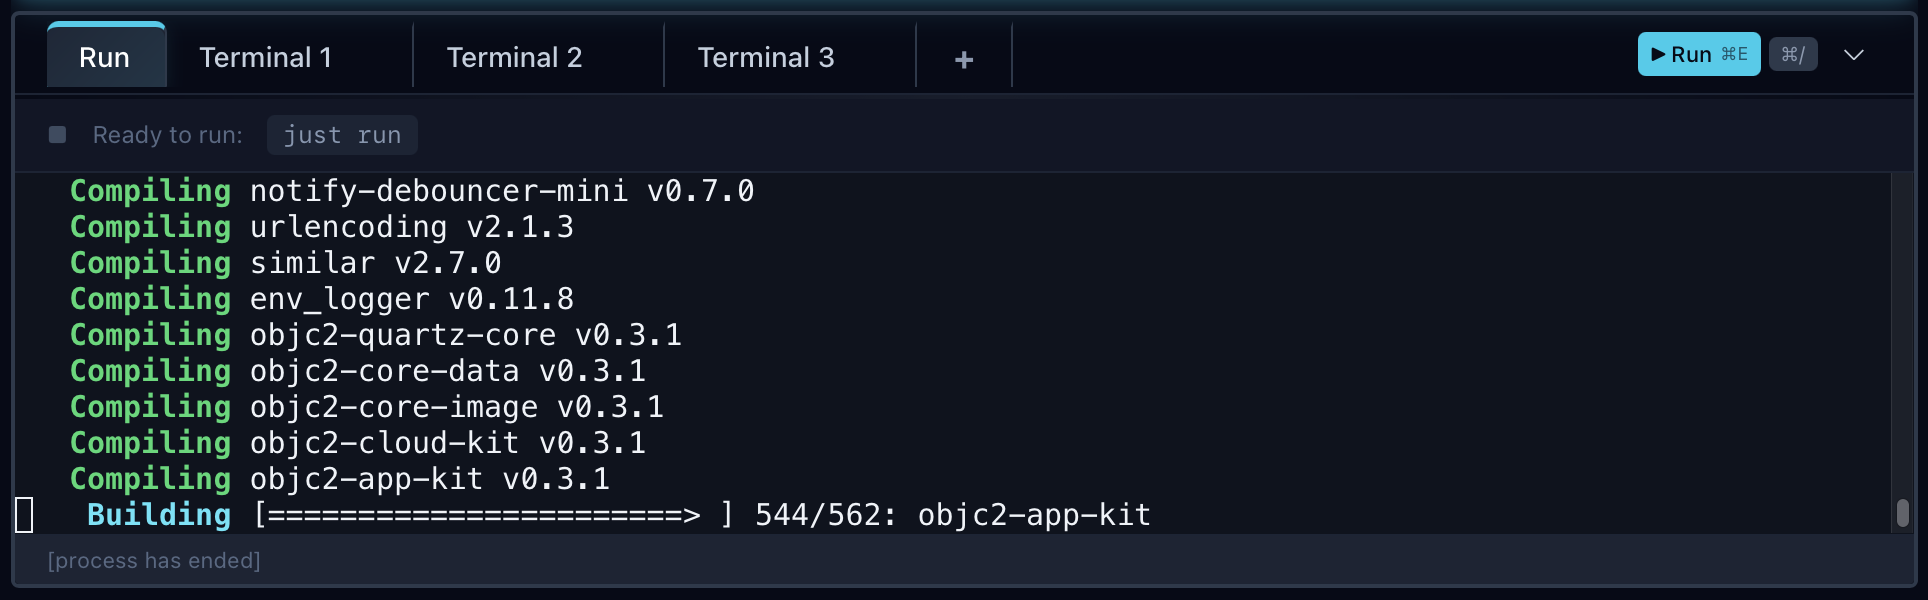
⌘E to execute it in the bottom terminal.Perfect for starting dev servers, running test suites, or building the project.Review Changes
Once the agent is done (or you want to check progress):Open the diff
Press 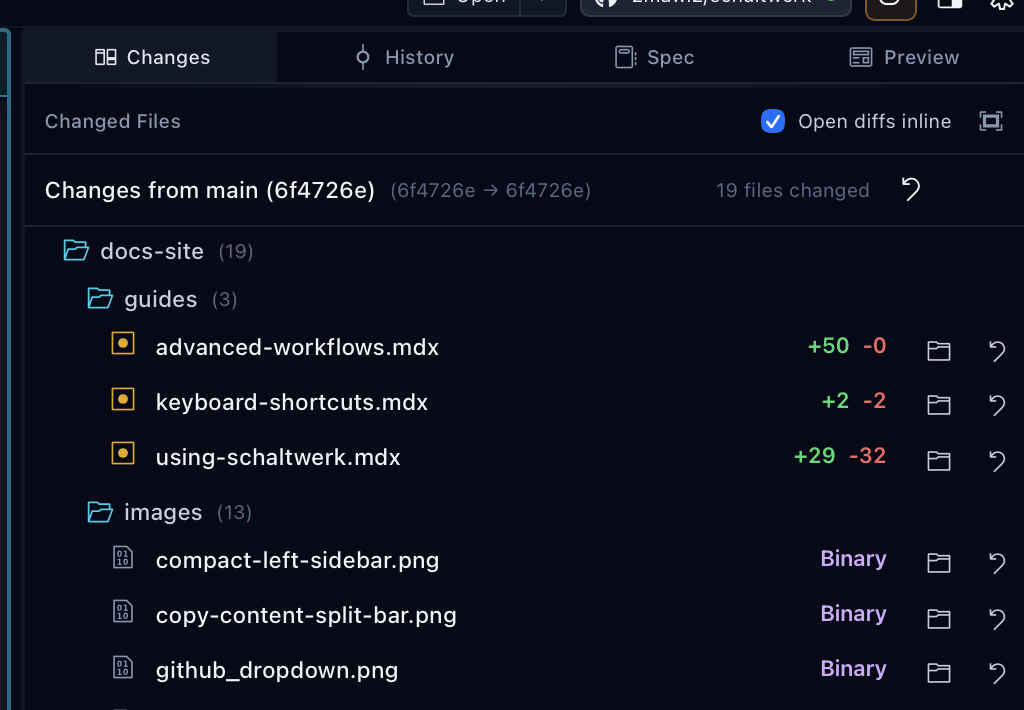
⌘G to view all changes the agent made. The Changes tab shows all modified files with line counts:Review inline
Click a file to open its diff. With inline mode enabled, the diff opens right in the sidebar—no context switching. Click Back to List to return to the file list.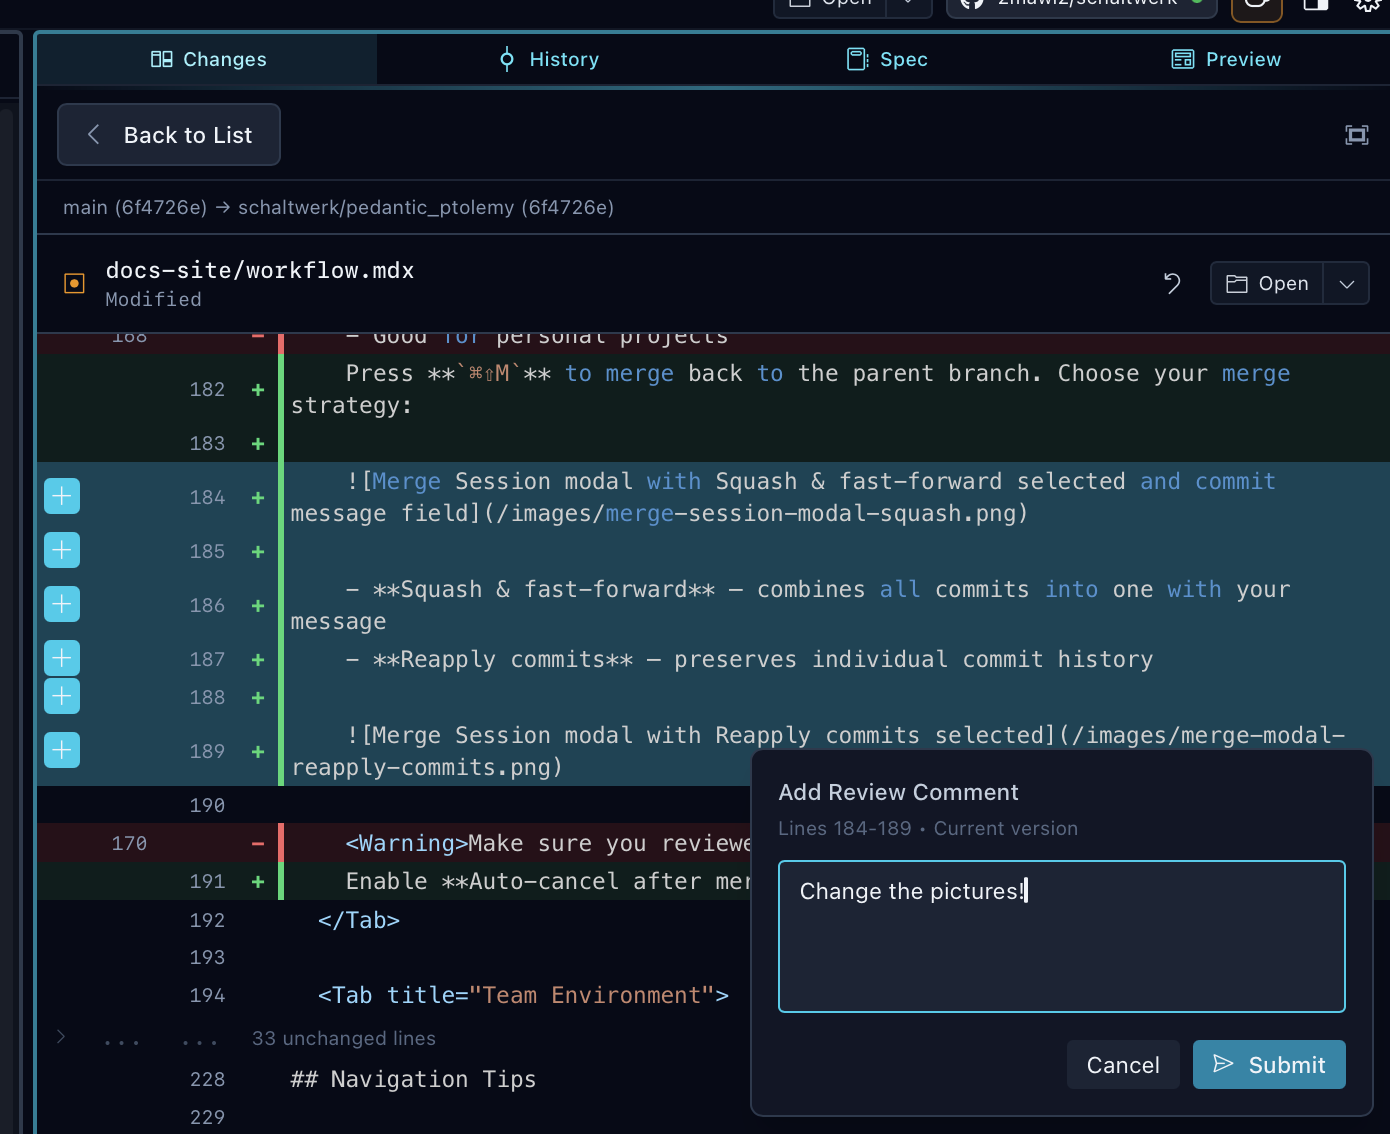
Add review comments
Select lines in the diff (click the + icons on the left) to add comments:
- Type your feedback in the comment form
- Click Submit to add the comment
- Click Finish Review (or
⌘Enter) to send all comments to the agent terminal
Mark as Reviewed
When you’re satisfied with the changes:Press ⌘R
This marks the session as ReviewedThe session moves to the “Reviewed” filter in the sidebar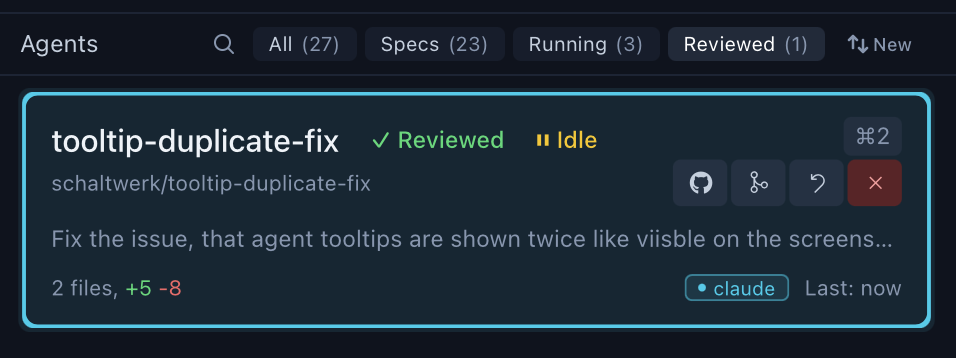
Merge or Create PR
- Merge to Main
- Create Pull Request
Press
⌘⇧M to merge directly to your base branch.Schaltwerk will:- Switch to the base branch
- Merge the session branch
- Push changes (if configured)
Clean Up
After merging, clean up the session:Next Steps
Workflow Guide
Learn best practices for daily use
Keyboard Shortcuts
Master the keyboard-driven workflow
Agent Setup
Configure agents, environment variables, and run mode
Core Concepts
Understand sessions, specs, and the orchestrator